5 Preservation Methods for Harvest Season
5 Preservation Methods for Harvest Season
The harvest season is upon us, meaning it’s time to start figuring out what to do with all the plentiful summer and fall produce. If you’re looking to save delicious summer tomatoes, make the most of the fall apple harvest, or just want to make the fresh herbs in the fridge last a bit longer, then we’ve got what you’re looking for! We’ll explain the 5 easiest methods we’ve found to help preserve fresh foods, homemade jellies, and delicious dill pickles for year round enjoyment.

Can-Do Attitude
Canning your own goods may seem like survivalist-level skill not for the faint of heart, but it’s actually quite easy to do with just a few tools and almost any food (ever heard of canned bread). Whether you’re looking to can homemade tomato sauces, jellies & jams, or are looking for a fun personalized gift to give for holidays and special events, canning your own food is the perfect way to go!
There are a few methods for canning, the most common two being the water bath method and pressure cooker method. Water bath is much more beginner friendly, and requires little to no specialized tools. Using a pressure canner is for the more advanced canners out there, as it requires a specialized pressure cooker (no, you can’t use an instant pot), deals with high pressure and extremely hot liquid, and if damaged or used incorrectly, can explode. That being said, as long as you follow the manufacturer's instructions for your device and use educated caution, there shouldn’t be anything to worry about. While on the topic of safety, improperly canned foods is the most common cause of Botulism in the US, a very rare but serious illness. Again, by following the manufacturer’s and recipe’s instructions well, along with the CDC’s recommendations for home canning, the risk of contamination is extremely low. Canning really isn’t as scary as it sounds, I promise!
Using a water bath is a great beginners introduction to canning, and is perfect for preserving your own jellies, jams, fruit sauces, and purees. To put things simply, submerging a filled can in boiling water kills any bacteria while steam inside the can evaporates, creating a vacuum seal as it cools. Pressure canning works on the same principles, but the high pressure allows the water to reach much higher temperatures, and the long processing time is perfect for cooking denser goods like dried beans.
Pro tip: if you’re new to the world of water bath canning and don’t have a canning rack to elevate the jars off the bottom of the pot, you can place a towel at the bottom of the pot instead.
Canning Recipes to Try:
Canning How-To’s:

Funky Fermentation
While it’s thought to be one of the more *out there* methods of preservation, fermentation is much more prevalent in everyday life than you may realize. Alcohol, vinegar, yogurt, sourdough, miso, sauerkraut, kombucha, and kimchi are all creations of fermentation (even some cheeses and pickles too)!
This process occurs when microorganisms, usually a form of bacteria or yeast, eat away at the sugars and carbohydrates and produce lactic acid, which preserves the food and gives it that funky sour flavor. With these positive forms of bacteria and microorganisms being present, fermented foods are great for your gut biome and digestions. Many store bought versions of these fermented products are pasteurized at high temperatures to kill off potential bacteria and make them shelf stable, which also kills the positive microorganisms as well. Making them at home is a great way to preserve these hard working helpers!
As fermented foods rely on cultivating airborne or pre-cultured microbes and leaving foods unrefrigerated for long periods of time (anywhere from days to months), it’s important to start the process by thoroughly cleaning all the tools being used. This ensures that no harmful bacteria are present to hinder your fermentation, giving you the greatest chances for success without upsetting the “good” bacteria or your stomach. Most recipes suggest leaving your creations in a “cool, dark place”; most pantries, cupboards, or countertops out of direct sunlight should work perfectly as a fermentation station. Sunny or warm spaces speeds up the fermentation process (ie. proofing dough) causing the bacteria to both eat and tire out faster, while fridges are too cold and will slow down the bacteria, putting them in a dormant, sleep-like state.
If you’re new to the fermentation game, we’d recommend starting by following a well-reviewed recipe exactly as it’s written. Fermenting is a delicate process, so changing small bits and pieces can have a big impact in the long run. Sauerkraut or yogurt are great places to start, as they usually require only 2-3 ingredients, and can be eaten after only a few days. Once you get used to the process and learn more about what does and doesn’t work, the basic ratios of salt / probiotic / yeast to fresh foods, and so on, then you can start (cautiously) experimenting with your own creations. And if your first batch doesn’t turn out as intended, don’t be discouraged! It happens to the best of us, so dust yourself off and try again.
Fermentation Recipes to Try:

Dehydration Nation
Dehydrating is one the simplest methods for preserving foods, yet can be one of the most time consuming. Don’t worry though, almost all of it is hands-off wait time, meaning there’s no extra work for you!
Drying out foods is simple enough to do in a variety of methods, making it easy to accommodate with your lifestyle and time limitations. The preservation is activated by removing most of the water content from the foods, starving the bacterium that would cause the food to rot naturally. Specialized dehydrators make the process super easy and hands off, but can be quite expensive, especially to those new to dehydrating. For beginners, you can easily dry out fresh herbs and produce with nothing more than an oven or even just using sunlight!
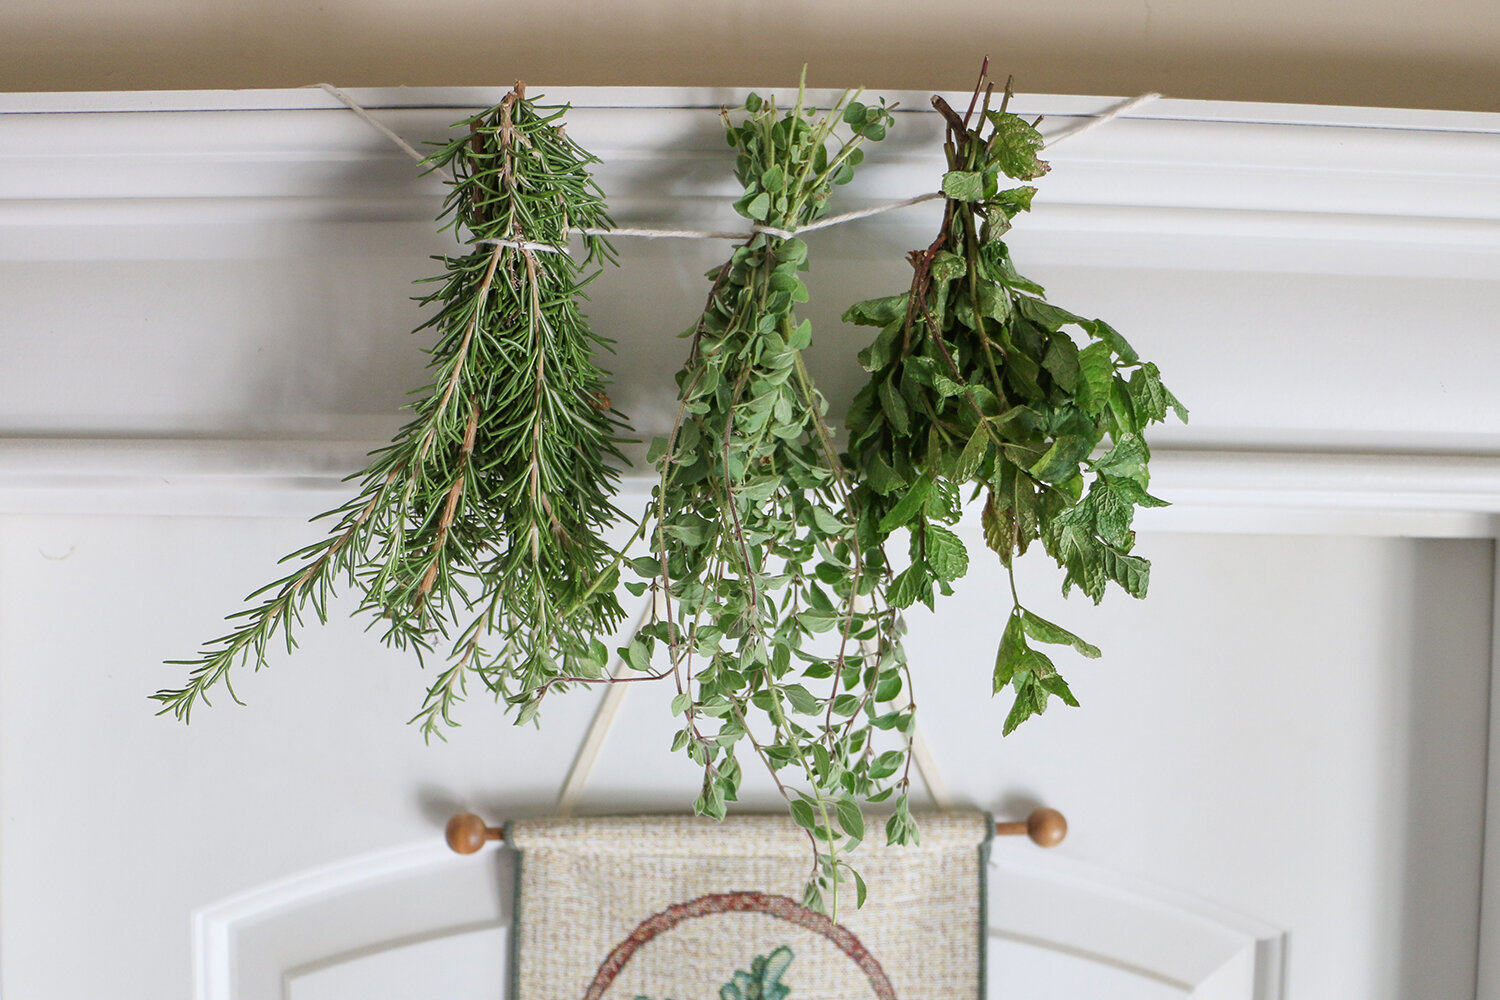
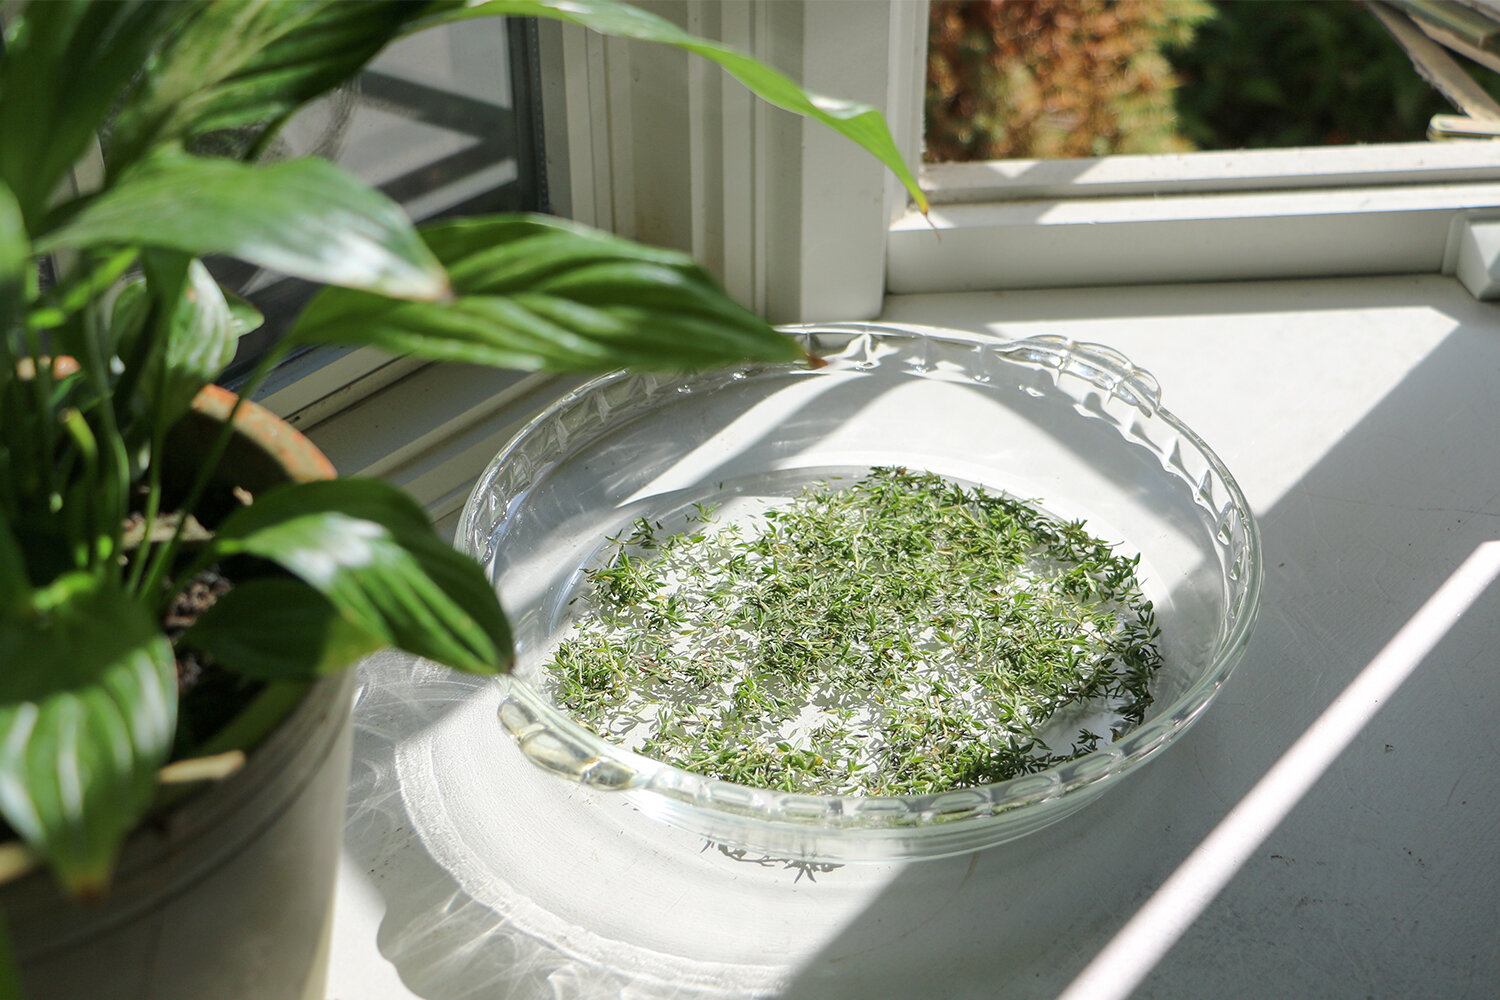
Delicate foods like fresh herbs, tomatoes, and berries can be easily dried in a sunny spot with some mild heat, and almost no effort needed. Place your produce on a dish, baking tray, or repurposed storage box outside in direct sunlight on a warm day, and let the heat and fresh air work its magic. To keep birds or bugs off the goods while they dry, consider placing a wire cooling rack or glass sheet on top (perfect for leftover Ikea glass shelves), making sure to leave a small opening for the water to evaporate fully. Herbs can simply be dehydrated by hanging them up in a pantry for a few days, allowing the water inside to naturally dissipate and dry up.
Other thicker items can be dehydrated in the oven, perfect for making your own fruit roll ups, apple chips, or jerky. Simply thinly slice your items, coat in any seasoning or marinade desired, and place on a wire rack or baking sheet with a Silicone Baking Mat, and pop into a low oven (150°F - 200°F). If you have a convection fan option on your oven, turn that on to help speed up the process. This will take a few hours and the goods will need to be checked every so often to prevent accidental burning or over drying. And while it may seem tempting to quicken the process by turning up the heat, keeping it low and slow will consistently give you a more even dehydration without cooking the food.
Freeze drying is another preservation method worth mentioning, yet isn’t exactly practical for the home cook and everyday gardener. It’s a process of using both extremely cold temperatures and low pressure to remove the water content of an item, and is actually closer to dehydrating than freezing (as the name may suggest). Most notably used by military and astronauts for shelf stable meals starting in the 1950s, this method is nowadays used in ready-to-eat camping meals, snackable dried fruits, and instant coffee.
Dehydration Recipes to Try:

Pass the Pickles, Please
There’s a wide world of pickling beyond what comes to mind as your standard pickle, which is just a pickled cucumber. With anything from fruits to veggies, meats and more (can I offer you an egg in this trying time?), pickling is a great way of adding in a punch of flavor while prolonging the life of your fresh foods.
The pickling process consists of preserving fresh foods in either a brine or vinegar solution. Doing so will change the texture and flavor of the items, but can add a lot of punch with both the pickled item and liquid itself. This makes pickled goods a great addition to any sandwich, salad, bowl, charcuterie board, or just served as a side dish! Changing the herbs, spices, and the vinegar used for pickling will greatly change the overall flavor of the finished product. Most brines consist of vinegar, water, salt, sugar, and spices or herbs, and playing with the ratios of those ingredients will give you the good powerful juice to preserve anything you could want.
Even between good old-fashioned pickles, there can be a huge variation depending on what you add to it! Sticking to dill, garlic, and white vinegar will give you a classic savory dill pickle, but change the vinegar to rice wine, add in some more sugar and ginger, and you’ve got sweet Japanese-styled pickle, or throw in a bit of red chili flakes and sesame oil for spicy Korean pickles. Just by changing a few simple ingredients and quantities, you can morph the finished product to go with whatever dish the pickles will accompany!
Once you’ve finished a jar of your pickled goods, don’t throw out the juice just yet! Repurpose the brine by adding in fresh veggies for a new batch of pickled goods (with a now milder pickled taste), reuse for brining meats, adding to specialty cocktails, or mix it into your pasta or veggie salad dressing of choice. Pickle juice is even a secret ingredient in many rye bread recipes! So get creative and see what wacky pickling creations you can make.
Pickling Recipes to Try:

Fresh, Yet Frozen
While you may not think of it as such, freezing is probably the most common form of food preservation used in your everyday life. Just think about all those old bananas you have saved in the freezer, waiting to be made into banana bread!
Frozen foods often get a bad wrap of being unhealthy, lazily prepared, and less nutritious as their fresh counterparts. And while this can be true in some cases (often with highly processed pre-made meals), frozen produce can actually be higher in nutritional value than its non-frozen alternative! If the produce is frozen shortly after harvesting, it can retain all its key vitamins and minerals, whereas fresh foods will lose nutrition as it begins to age and break down. And without altering the flavors of fresh fruits and veggies, freezing is a great option!
Although the flavors and nutrients are preserved by freezing fresh produce, it can often alter the texture, changing the originally crunchy carrot or popping blueberry into a softer version of itself. While eating defrosted strawberries may not be as appealing as the fresh thing, frozen produce is perfect for adding to smoothies, baked goods, and sauces where the original texture wouldn’t matter anyway! Even more delicate greens like spinach and swiss chard hold up well with freezing, and make it easy to add some extra veg to a quick weeknight soup or stir fry. Liquids can easily be preserved in the freezer as well. Portion out fresh squeezed juices like lemon and lime juice, beverages like coffee, or homemade veggie broth into ready to use portions for your next recipe, or simply to defrost at a later time.
To freeze everything yourself, simply rinse off your produce, pat it dry to remove any excess water, place it on a freezer safe dish or baking pan in a single layer, and pop it into the freezer to harden. For easy removal later, we recommend freezing on a Silicone Baking Mat, this will prevent the foods from freezing and sticking to the metal baking tray. Once the outside is frozen, remove from the freezer and transfer into the freezer-proof storage container of your choice.
Frozen Recipes to Try